Anki Curses
July 16, 2023
(Github Link)
The Problem
As a student and a programmer, I have a lot of stuff to memorize. Anki allows me to do this efficiently, but there’s a problem: the only vanilla way to study is through AnkiWeb (a web app), or Anki’s desktop program (a qt (GUI) app). Neither of these options allow me to do my daily reviews without leaving the terminal, and they both require excessive use of the mouse.
My first thought was to search for a curses alternative, but apparently not many people have the same problem as me, because I couldn’t find one.
The Solution
Anki turns out to be open-source! So begins this project.
Anki’s Architecture
The codebase has three main components: Rust (back-end), Python (front-end), and TypeScript (working with cards). The TypeScript component mainly involves specialized card features (like image occlusion and LaTeX), which I didn’t think were feasible for a minimalist curses program, and since the qt program is written in Python, there is a Python interface for the Rust back-end. Therefore the curses program can be written entirely in Python, and (in theory) has no less power than the qt GUI, since it has access to the same library.
Implementation
The implementation was surprisingly painless. The main challenge was becoming familiar with the codebase (which was lightly documented). I was able to get a working version in around 15 hours; a lot of that time was spent learning curses (as I’ve never used it for a non-toy project).
HTML
The biggest “technical” issue was parsing HTML: Anki stores cards and notes in subtly different HTML formats, and I also used HTML to style formatted text drawn on the screen1. The use of multiple layers of HTML caused a few minor difficulties.
Consider a note with the following text:
Front:
this is the
question
Back:
& this is the
answer
This is stored in the database as:
Front:
<i>this</i> is the<br><b>question</b>Back:
& <i>this</i> is the<br><b>answer</b>During review, to print the card, this text2 is checked for Cloze Deletions3, br and div tags are converted into newlines, and bold/italic/underline tags and HTML escape sequences (e.g. &) are left unchanged:
Front:
<i>this</i> is the
<b>question</b>Back:
& <i>this</i> is the
<b>answer</b>The text is then passed to the print function, which parses it as HTML again, converting it to a (plain-text, attribute-list) pair (for printing), which looks ike this.
Front:
("this is the\nquestion", [italic] * 5 + [normal] * 8 + [bold] * 8)Back:
("this is the\nanswer", [italic] * 5 + [normal] * 8 + [bold] * 6)This form can now be easily printed onto a terminal screen.
The procedure for producing note text to edit is slightly different, because the style tags (italics, bold, underline) should remain in the text. This can’t be done directly, however, because this allows multiple db-texts to convert to the same plain-text, leading to an ambiguous reverse-conversion4. For example, consider a note whose text is “text” (italicized). It is stored in the database as “<i>text</i>”, and converted to editable text as the same string. Now consider a note whose text is literally “<i>text</i>”: it is stored in the database as “<i>text</i>”, and converted to editable text as “<i>text</i>”, the same string as above. Therefore, if both notes are edited and saved as-is, at least one of them will be changed.
To make a representation with no ambiguity, the db-text to editable-text conversion must be one-to-one. The obvious way to do this is to edit the db-text format directly, but this is really inconvenient if your cards contain a lot of angle brackets and ampersands (which is true in my case). I decided to instead escape the bold/italic/underline tags with backslashes (and escape the backslash with two backslashes). The above examples would convert to “\itext\I”, and “<i>text</i>”, respectively. “\i” corresponds to “<i>”, and “\I” corresponds to “</i>”. This conversion is a little ugly (the backslash-escape tags are harder to differentiate from the text than html tags), but it works.
Practical OOP
The entire program is made up of only two (2) distinct “screen types”5 (ui layouts): reviewer and select-from-list. The reviewer only has one use, but there are several uses of select-from-list (deck manager, note browser (:find, :findin), choose-a-note-type (:new)). The SelectFromList class6 is used for all of them.
class SelectFromList(KeyHandler):
    choices: list[T]
    is_match: list[bool]

    def init_keybinds(self) -> None:
        self.keybind_map = \
        {
            'h': self.no_selection,
            'q': self.no_selection,
            'j': self.move_down,
            'k': self.move_up,
            '/': self.search,
            'n': self.next_match,
            'N': self.prev_match,
            'f': lambda: self.screen_down(curses.LINES - 4),
            'b': lambda: self.screen_up(curses.LINES - 4),
            'd': lambda: self.screen_down((curses.LINES - 4) // 2),
            'u': lambda: self.screen_up((curses.LINES - 4) // 2),
            'g': lambda: self.screen_up(1e18), # go to top
            'G': lambda: self.screen_down(1e18), # go to bottom
            'l': lambda: True,
        }

        self.keys_handled_by_parent = [':']

    def __init__(self,
        mm, # main menu
        parent: KeyHandler,
        prompt: str,
        choices: list[T],
        elem_to_strs: Callable[[T], tuple[str, str, str]], # (left, center, right)
        elem_is_match: Callable[[T, str], bool] = lambda e, s: False, # for searching
        keybind_help = "hq=back  jk=navigate  l=select"):

        self.init_keybinds()

        # ...

    # ...
As a result, adding vim-like bindings (navigation keys, command mode, search) to this one class makes those bindings applicable almost everywhere in the program.
For example, print_styled_mu(window, 0, 0, “<b>bold</b> <r>red</r>”) prints “bold red” at (0, 0) in the given window. ↩︎
The note-dictionary (from the database) is actually not parsed directly, because this throws away the generality of question-answer formatting for notes with more than two fields. Anki’s backend note object provides .question() and .answer() methods, which provide HTML in a slightly different format, which is then weeded of redundant tags, and processed as described above. ↩︎
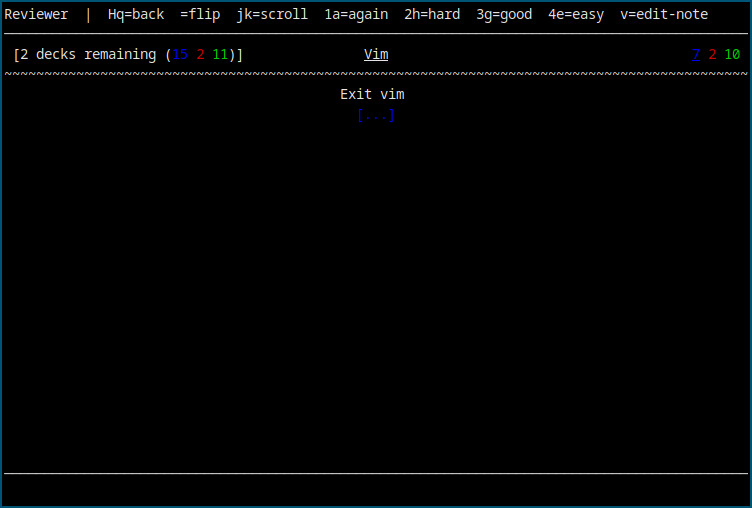
Cloze Deletions allow for removal of specified text on the card: see the image at the top of this post as an example. ↩︎
Assuming angle brackets and ampersands are not escaped in the plain-text ↩︎
With exception of the text-editor, but all text-editing is done by calling $EDITOR on a tempfile; this is easy to implement and ideal for workflow. ↩︎
I opted for lambda functions instead of overridden methods to allow SelectFromList to be used directly (without override). ↩︎